
티스토리 뷰
.Net Core 5.0으로 만든 WPF 프로젝트를 ClickOnce로 배포하는 방법에 대해서 알아 보도록 하겠습니다.
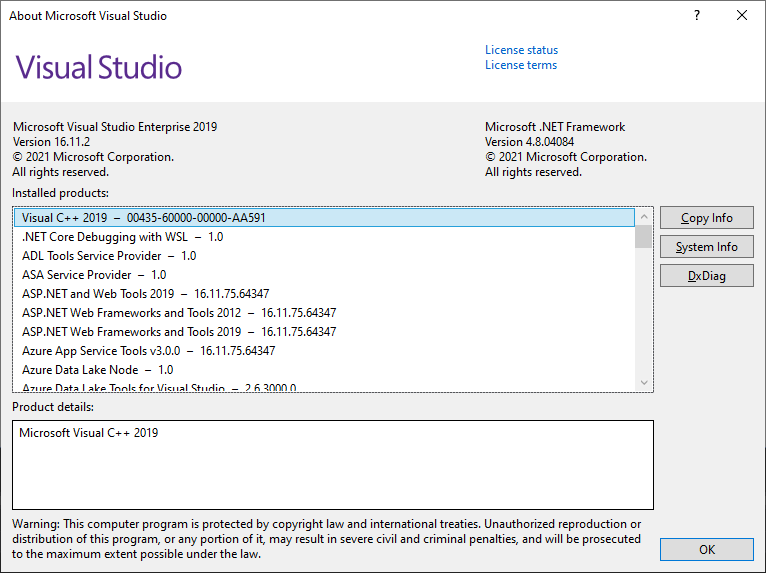
Visual Studio 2019 버전은 16.11.2를 기준입니다.
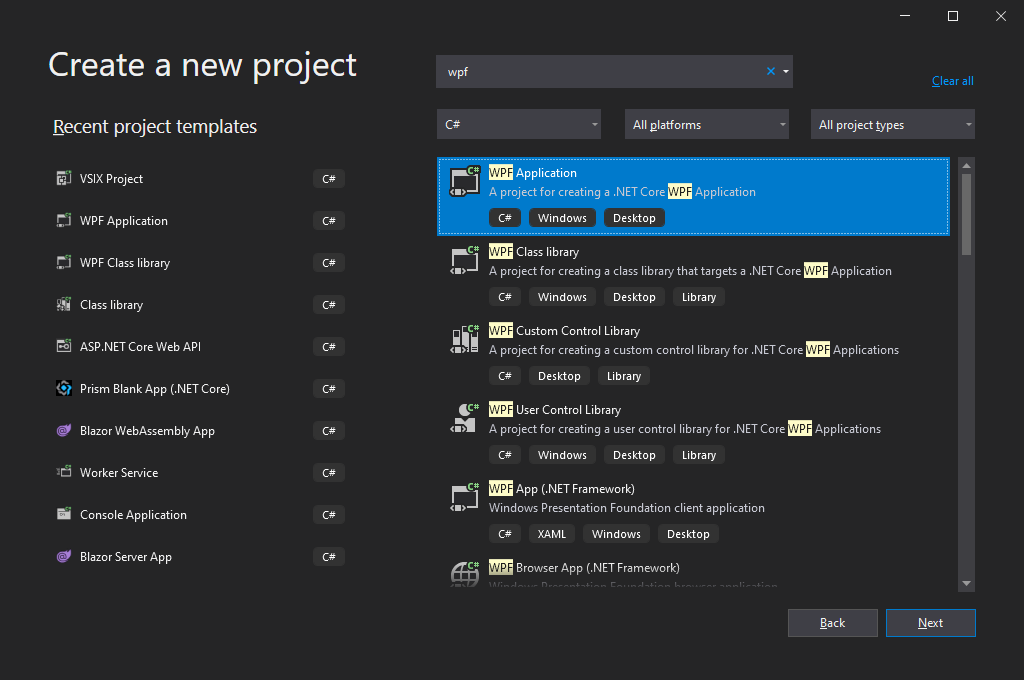
1. WPF 프로젝트 생성
Create a new project -> wpf 검색 -> WPF Application 선택 후 Next
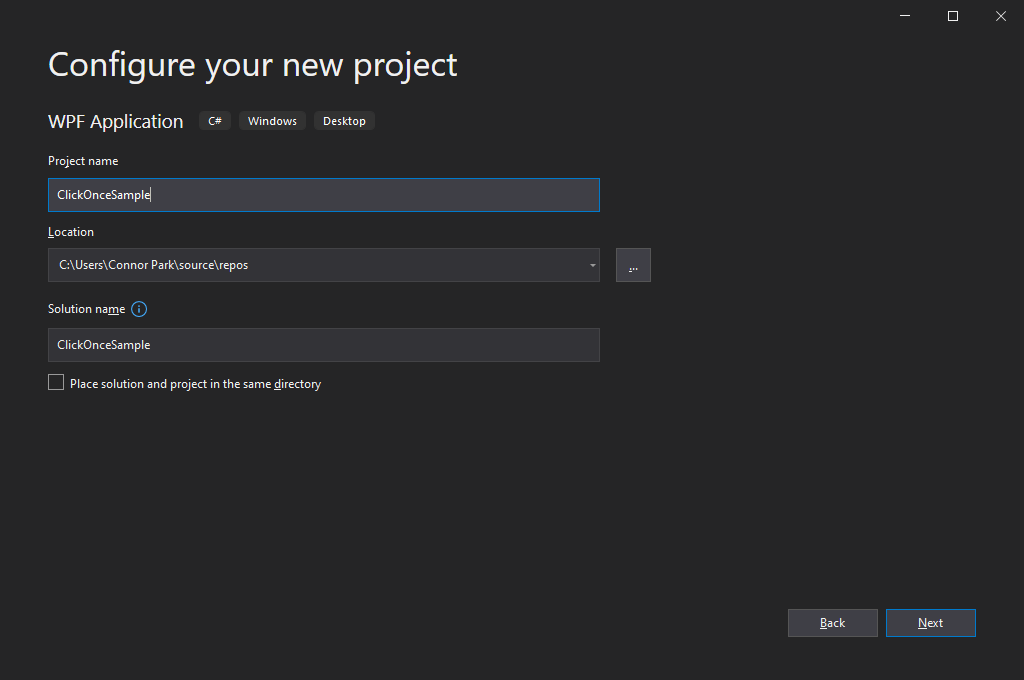
Project name을 입력 후 Next
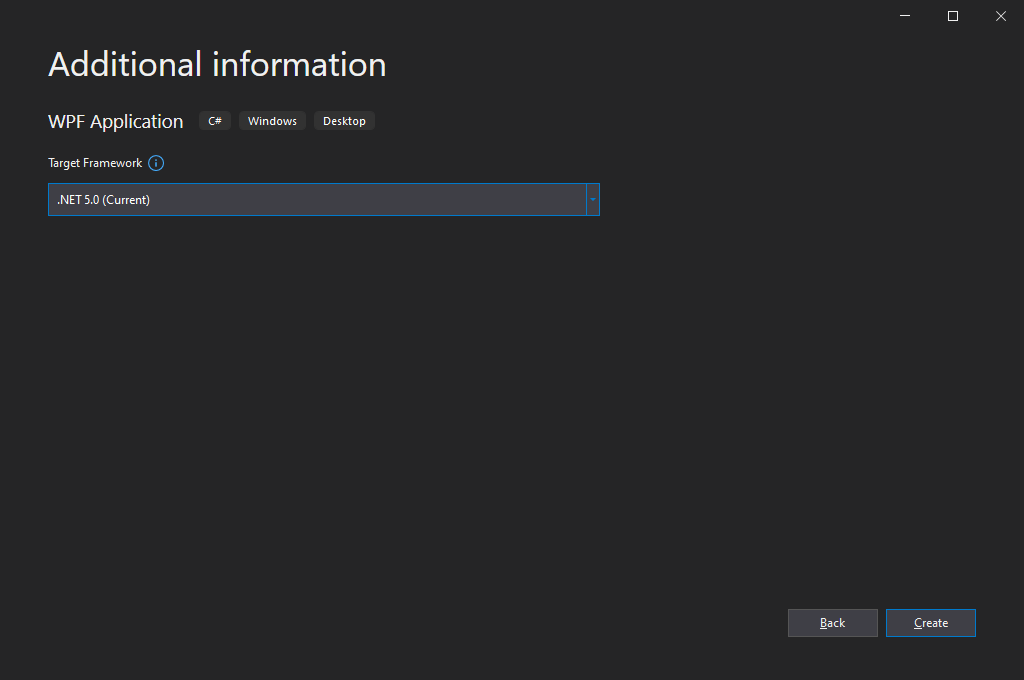
.NET 5.0 선택 후 Create
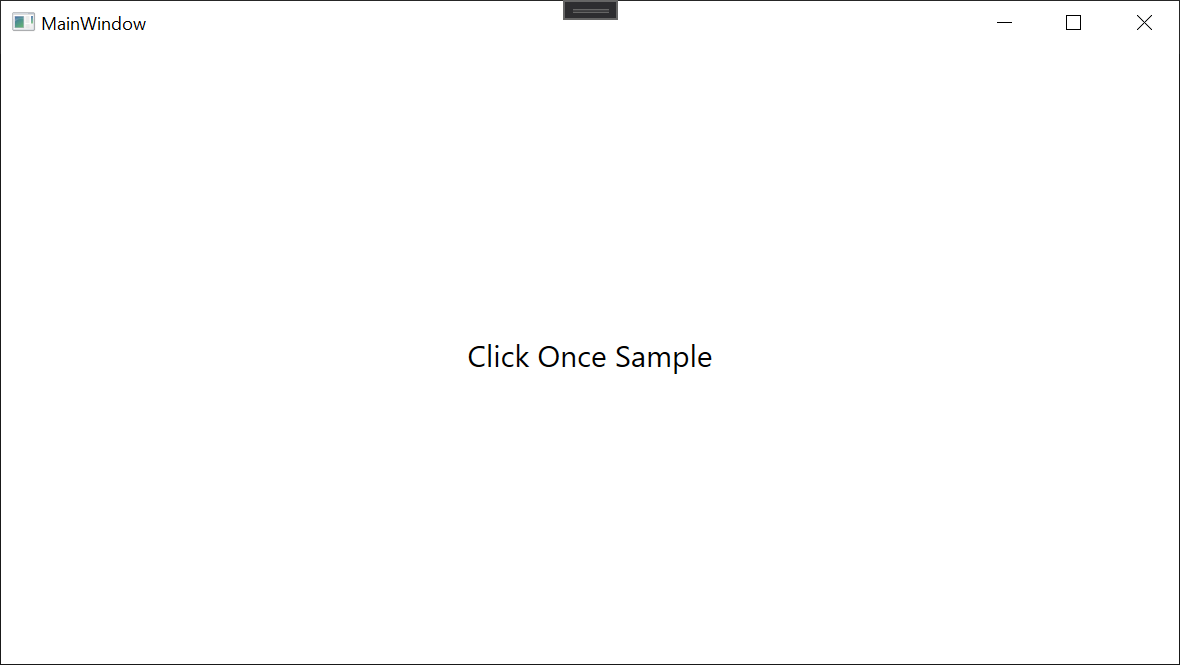
MainWindow.xaml에 간단한 TextBlock 추가
<Window
    x:Class="ClickOnceSample.MainWindow"
    xmlns="http://schemas.microsoft.com/winfx/2006/xaml/presentation"
    xmlns:x="http://schemas.microsoft.com/winfx/2006/xaml"
    xmlns:d="http://schemas.microsoft.com/expression/blend/2008"
    xmlns:local="clr-namespace:ClickOnceSample"
    xmlns:mc="http://schemas.openxmlformats.org/markup-compatibility/2006"
    Title="MainWindow"
    Width="800"
    Height="450"
    mc:Ignorable="d">
    <Grid>
        <TextBlock
            HorizontalAlignment="Center"
            VerticalAlignment="Center"
            FontSize="20"
            Text="Click Once Sample" />
    </Grid>
</Window>
실행 화면
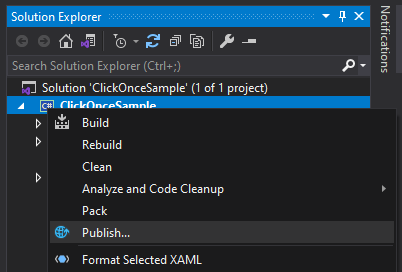
2. Click Once Publish
프로젝트 마우스 오른쪽 클릭 -> Publish... 선택
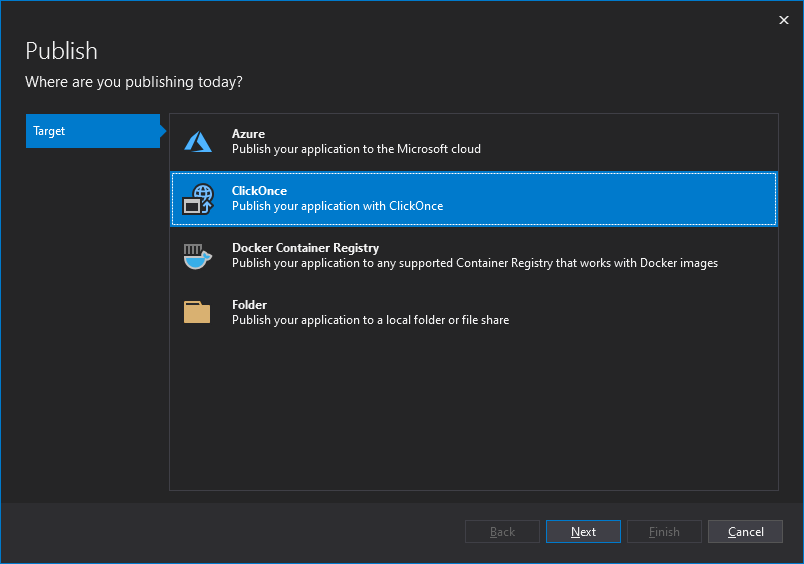
Target을 ClickOnce 선택
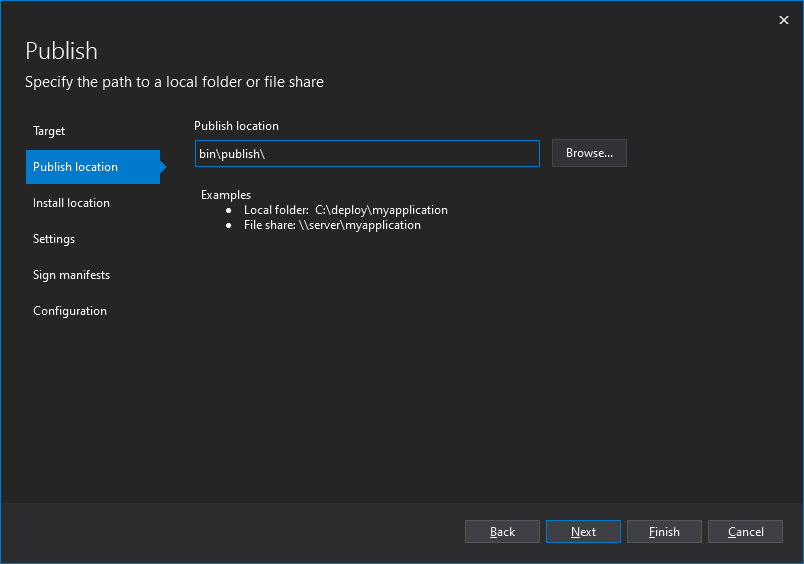
Publish location 선택 후 Next (기본 값으로 두면 됩니다.)
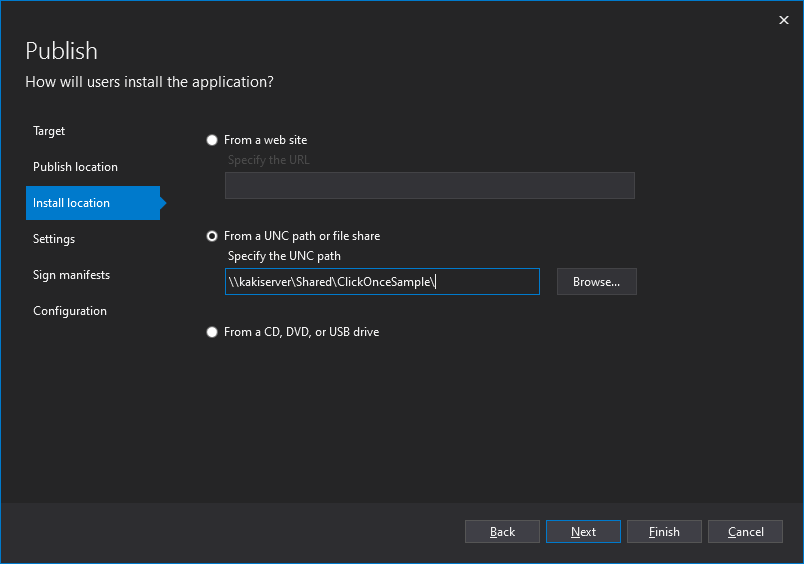
설치 위치를 지정합니다.
From a web site : 웹 사이트에서 설치를 하는 경우
From a UNC path or file share : 네트워크 폴더에서 설치를 하는 경우(오늘은 여기다 배포를 하겠습니다.)
From a CD, DVD, or USB drive : 압축파일 형태로 설치하는 경우
저는 네트워크 폴더에 배포할 예정이라 해당 경로를 입력합니다. Next를 클릭합니다.
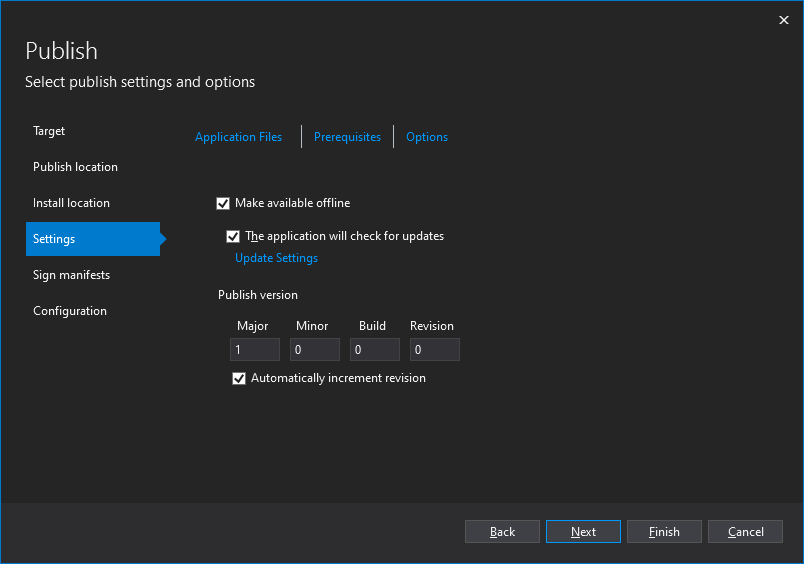
설정
Application Files : 애플리케이션 실행할 때 필요한 파일들을 포함하거나 포함하지 않고 배포할 수 있습니다.
Prerequisites : 닷넷 런타임을 선택해서 함께 배포할 수 있습니다. 이 프로젝트는 .NET Desktop Runtime 5.0.9 (x64)를 다운로드해서 설치하도록 구성되어있습니다.
Options : 몇가지 옵션을 입력합니다.
설치 중 xxxx파일이 없습니다라는 메시지가 나오면서 설치가 중단되는 경우 Application Files을 클릭해서 Publish Status가 모두 Include가 되도록 수정해서 진행해 보시기 바랍니다.
Next를 클릭합니다.
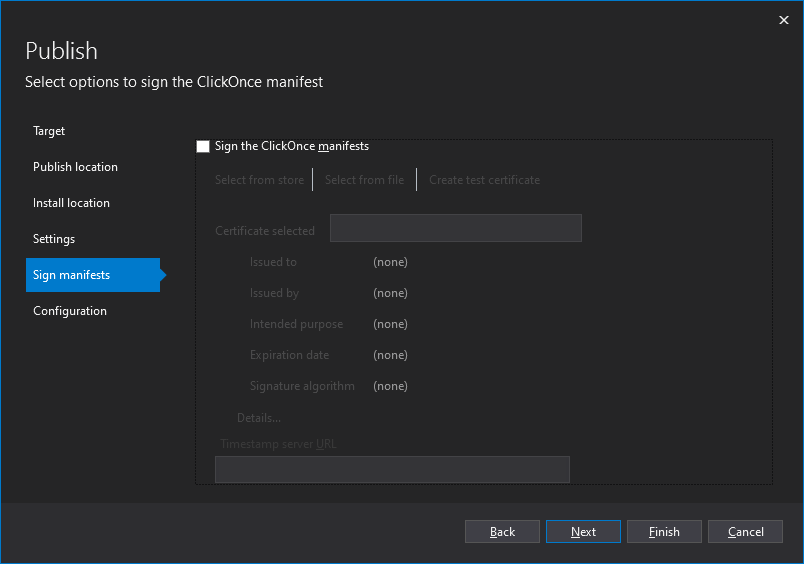
ClickOnce sign 관련 항목입니다. 공인된 인증서가 있는 경우에는 사용하실 수 있습니다.
저는 없기 때문에 Next 클릭합니다.
인증서 관련해서는 테스트를 해보지 못했기 때문에 관련 오류가 발생하면 댓글로 남겨주시면 확인하도록 하겠습니다.
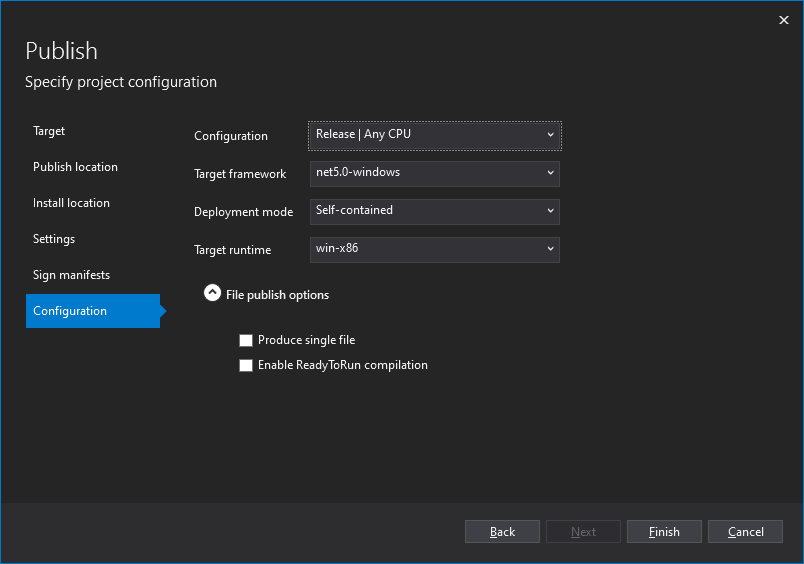
최종 구성 확인입니다.
여기서 Deployment mode를 Framework-dependent에서 Self-contained로 변경하면 필요한 파일을 포함해서 배포 패키지를 구성할 수 있습니다.
Finish를 클릭합니다.
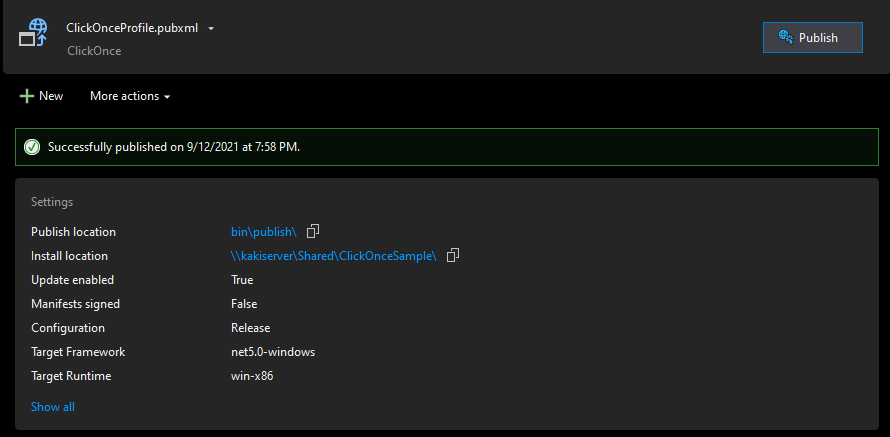
이제 Publish를 할 준비가 완료되었습니다. Publish버튼을 눌러서 패키지를 만들어 줍니다.
Publish 도중 아래와 같은 메시지가 출력되었으며, 이런 경우에는 Tools -> Options -> NuGet Package Manager -> General -> Default package management format : Packages.config로 변경하니 아래와 같은 메시지가 출력되지 않습니다.
2>The plugin credential provider could not acquire credentials. Authentication may require manual action. Consider re-running the command with --interactive for `dotnet`, /p:NuGetInteractive="true" for MSBuild or removing the -NonInteractive switch for `NuGet`
2>Retrying 'FindPackagesByIdAsyncCore' for source 'https://nuget.telerik.com/nuget/FindPackagesById()?id='Microsoft.NETCore.App.Runtime.win-x86'&semVerLevel=2.0.0'.
2>Response status code does not indicate success: 401 (Logon failed.).
2>Retrying 'FindPackagesByIdAsyncCore' for source 'https://nuget.telerik.com/nuget/FindPackagesById()?id='Microsoft.WindowsDesktop.App.Runtime.win-x86'&semVerLevel=2.0.0'.
2>Response status code does not indicate success: 401 (Logon failed.).
2>Retrying 'FindPackagesByIdAsyncCore' for source 'https://nuget.telerik.com/nuget/FindPackagesById()?id='Microsoft.AspNetCore.App.Runtime.win-x86'&semVerLevel=2.0.0'.
2>Response status code does not indicate success: 401 (Logon failed.).
bin\publish를 클릭해서 publish한 폴더로 이동하고 모두 복사해서 install location에 붙여넣기를 해줍니다.
3. 설치 테스트
Windows Sandbox를 실행해서 해당 폴더로 접근한 후에 setup.exe를 실행합니다.
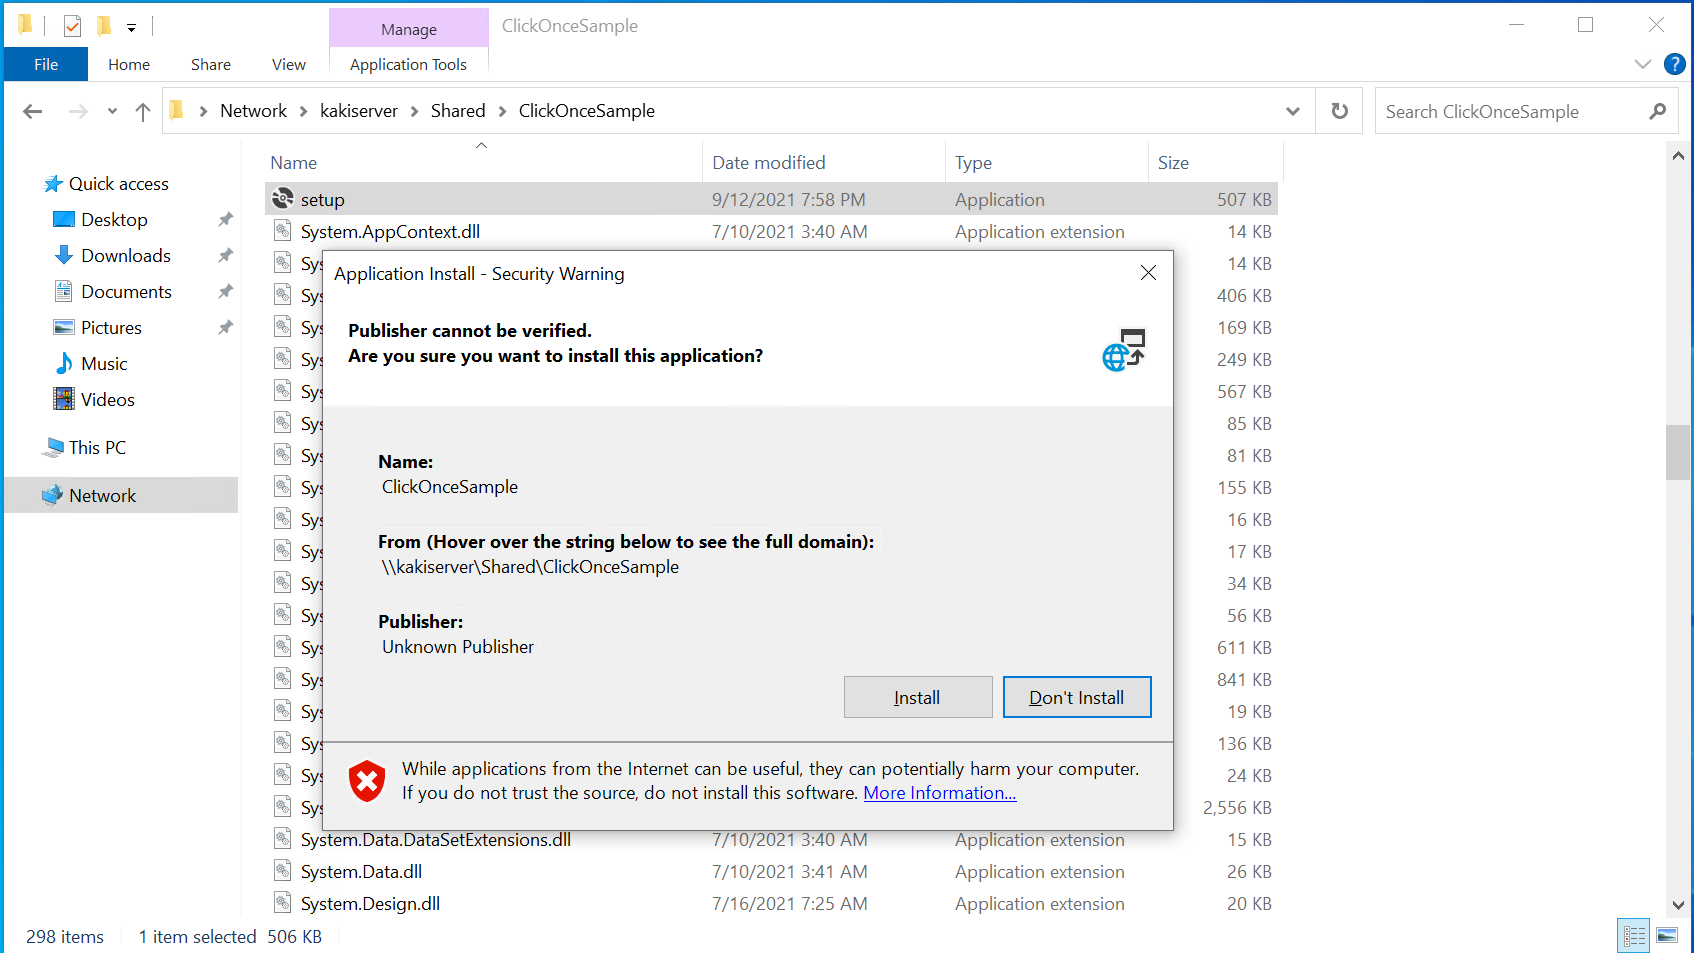
Install 버튼을 클릭하면 정상적으로 설치가 완료되고, 실행 됩니다.

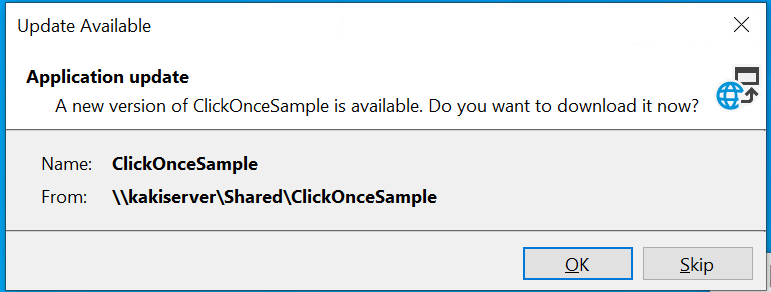
애플리케이션을 종료하고, 새로운 버전을 Install 폴더에 붙여 넣고, 애플리케이션을 다시 실행하면 업데이트 확인 창이 출력됩니다.
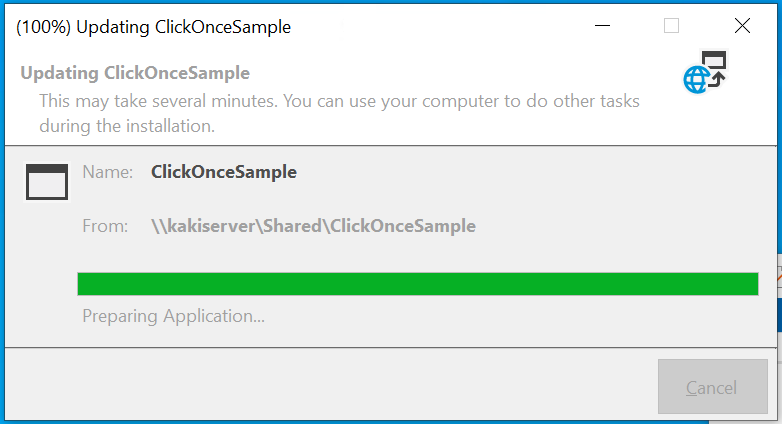
OK를 클릭하면 업데이트가 진행된 후 실행 됩니다.
4. 소스
kaki104/ClickOnceSample (github.com)
'WPF .NET' 카테고리의 다른 글
| C# WPF 개발로 진로를 고민하는 분들을 위해 (35) | 2022.01.21 |
|---|---|
| 2022 - SQLite Sample (0) | 2022.01.13 |
| ComboBox 목록에서 선택된 아이템을 뷰모델에서 사용하기 (0) | 2021.05.22 |
| Localization in WPF (4) | 2021.03.22 |
| Button Left Click시 ContextMenu 열기 (0) | 2021.03.10 |
- Total
- Today
- Yesterday
- #MVVM
- Behavior
- dotNETconf
- IOT
- WPF
- PRISM
- Always Encrypted
- kiosk
- windows 11
- C#
- Cross-platform
- ComboBox
- uno platform
- LINQ
- ef core
- uno-platform
- .net
- #prism
- Microsoft
- Build 2016
- #uwp
- Windows 10
- UWP
- visual studio 2019
- Visual Studio 2022
- .net 5.0
- Bot Framework
- #Windows Template Studio
- MVVM
- XAML
| 일 | 월 | 화 | 수 | 목 | 금 | 토 |
|---|---|---|---|---|---|---|
| 1 | 2 | 3 | 4 | 5 | 6 | |
| 7 | 8 | 9 | 10 | 11 | 12 | 13 |
| 14 | 15 | 16 | 17 | 18 | 19 | 20 |
| 21 | 22 | 23 | 24 | 25 | 26 | 27 |
| 28 | 29 | 30 |